Firebase is a Google-backed application development software that allows developers to develop iOS, Android, and Web apps. Firebase provides different tools for tracking analytics, reporting, fixing app crashes, and creating marketing and product experiments. The Firebase Realtime Database allows you to build rich, collaborative applications by allowing secure access to the database directly from client-side code. Your data remains local, and even while offline, real-time events continue to fire, giving the end-user a responsive experience.
In this, we’ll walk you through the steps required to add Firebase to your Flutter app, helping you get set up quickly and correctly.
If you’re new to this, checking out the Firebase Flutter documentation can also help clarify setup and usage across platforms.
Related Topic – Flutter CSV Field matching
Create a Project in Firebase
Before you begin the Firebase integration in Flutter, the first step is to create a Firebase project.
Steps:
- Head over to the Firebase official website.
- Click on the “Get Started” button appearing on the webpage.
- A new page will open. Click “Add Project”.
- Enter your project name in the tab appearing in front of you and press continue. Let’s move on with a sample name as “Test Project”.
- Select the checkbox appearing after clicking Continue and then click “Create project”. A new page will appear saying “Your new project is ready”. And you have successfully created a Firebase project. Click continue.
Adding Firebase to Flutter App
You’ve now completed the first part to add Firebase to a Flutter project for Android, iOS, or a web app easily.
How to Add Firebase in Android App
Here are the steps to add Firebase in Android app:
- Click on the Android icon from the three available platform icons.
- A new window will appear as shown below.
- You need to add “android package name”. Where to find that? Here you go.
- Go to the android folder in your project. Then go to app>src>main and there you will find a file named “AndroidManifest.xml”. There you will find the package name as selected in the window below.

- Copy the text and paste it in the “android package name” tab above.
- Enter the optional texts and click “register app”.
- After that, you will get an option to download the “google-services.json” file. REMEMBER: you should not change this file’s name. Or this all will be a total waste.
- Move the google-services.json file that you just downloaded into your Android app module root directory and then click Next. As shown here:

- The Google services plugin for Gradle loads the google-services.json file you just downloaded. Modify your build.gradle files to use the plugin.
- Now you need to add the line in dependencies as shown in the figure below. You need to check if the lines are available in the repositories. If not, then add them.
- Now you have to add plugins to the project-level build.gradle (
<android>/build.gradle):

Similarly, you have to add plugins tothe app-level build.gradle (<android>/<app-module>/build.gradle):
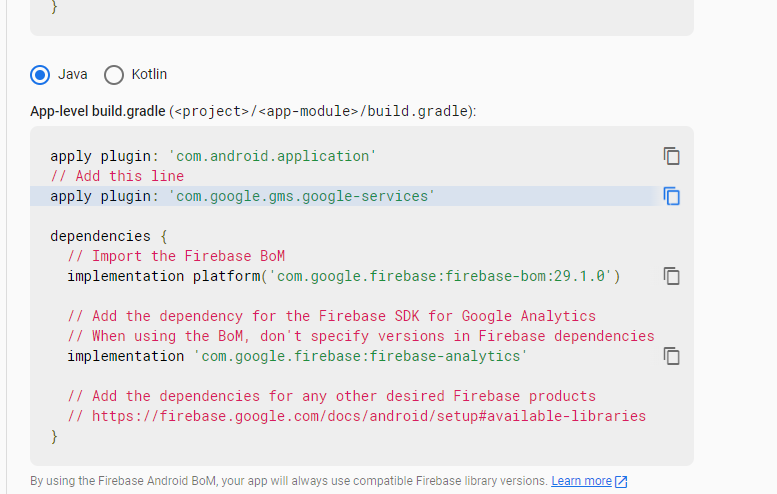
After adding the lines to “build.gradle” click “continue to console” and you are done with adding firebase to your android app.
How to Add Firebase in Apple app
To add the firebase project to your apple app, you need to have a macOS with XCode installed in it.
Steps:
- The same goes for the Apple app. Click on the iOS icon after clicking get started, same as you did for android earlier.
- Now the same page will open asking “Apple Bundle ID” to register your app. Now, again, where to find that? Just follow these steps.
- Run XCode, go to the ios folder in your project and you will find there a file named “Runner.xcworkspace”. See the image below
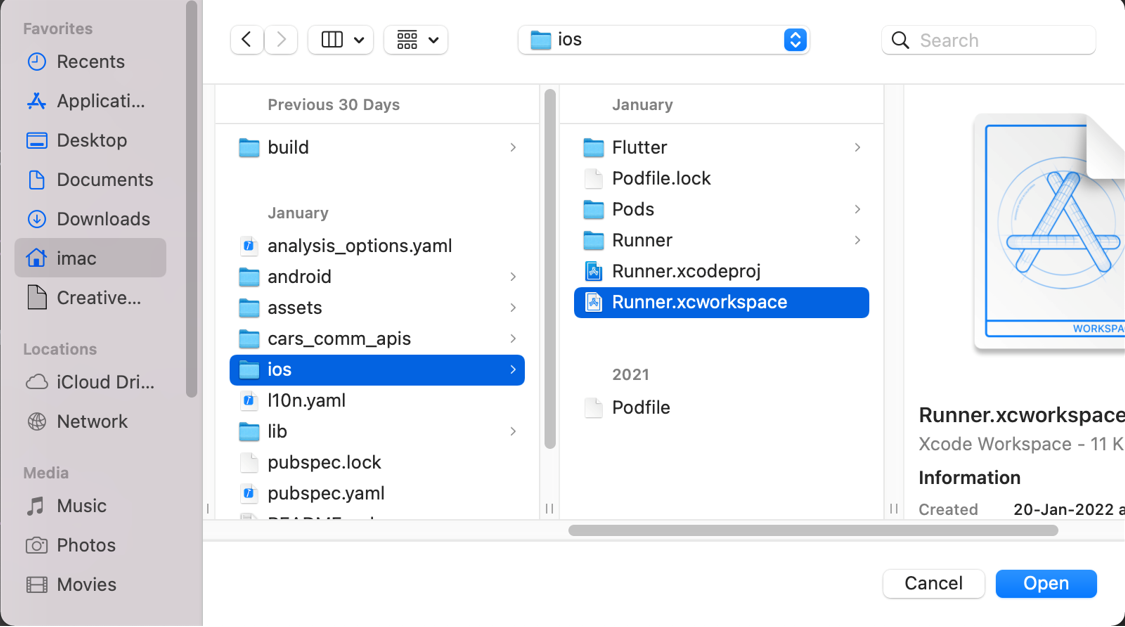
Run this file and there you’ll get Bundle Identifier having an id written in it as shown here.

- Copy the id and paste it into the register app portion in the “Apple Bundle ID tab”.
- Enter the optional fields, and click “Register app”.
- Next you have to download the file as you did earlier. Click “Download GoogleService-Info.plist” and the file will download automatically.
- Now click next and skip the next two options (Add firebase SDK & Add initialization Code) by pressing the next button.
- After this, press “continue to console”.
- Now it is the last step to finish adding firebase to your apple app to add the “GoogleService-Info.plist” file in the runner folder as shown below.
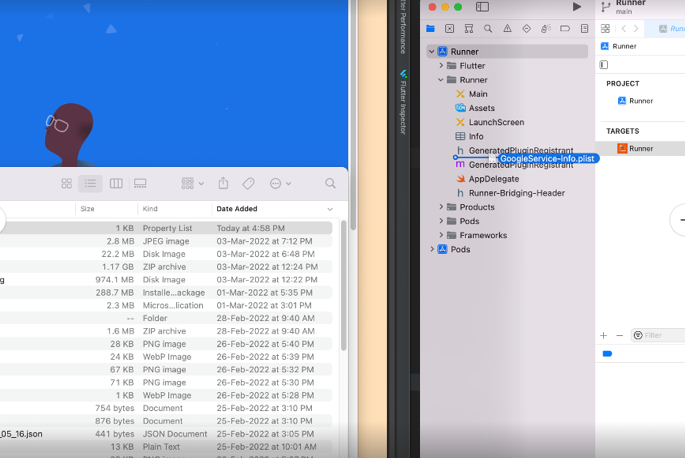
- A dialog window will appear, click Finish, and that’s it. You have successfully Firebase integration in Flutter to your apple app.
How to Add Firebase in Web App
To add Firebase to your Flutter app for the web platform:
- Click on the web icon appearing on the firebase webpage to add firebase to your web app.
- Same as before, you have to register the app giving any nickname to it. In the case of web apps, we don’t need packages to get started. So, enter a name and click “Register app”.
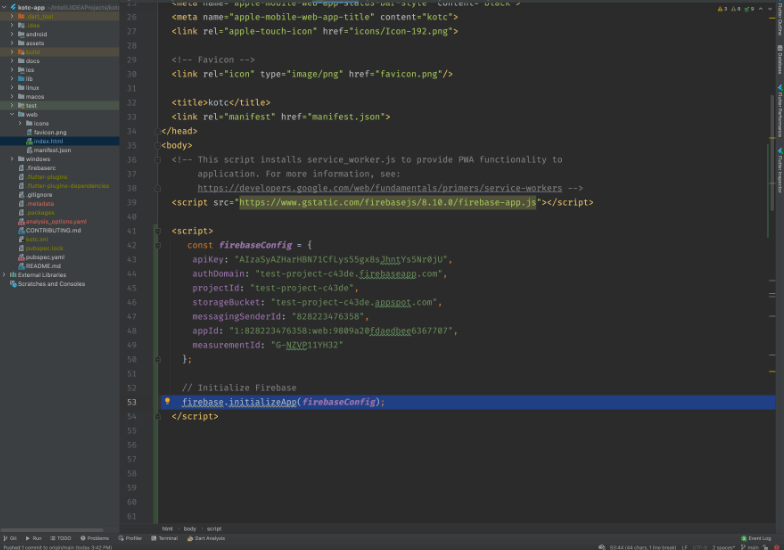
- Now simply, you have to put https://www.gstatic.com/firebasejs/8.10.0/firebase-app.js to the script portion in the body text.
- Then add the following text in the respective fields of your project as shown below.

- Add the const text into the body of your script and Initialize Firebase text shown in the picture above.
- Click “continue to console” and you have successfully added Firebase to your web app.
Over to You
This guide walked you through how to add Firebase to your Flutter app across Android, iOS, and Web platforms. If you ever feel stuck, don’t forget to refer to the Firebase Flutter documentation for deeper insights and updates. This is your go-to resource for mastering Firebase integration in Flutter.
If you’re pressed for time or need expert help, consider hiring a Flutter app developer. Have questions or suggestions? Drop a comment—FlutterDesk is always here to help.