After creating an application, your next step must be to launch your application on PlayStore. Google Play Store, with almost 1 billion Android users, has a significantly larger audience and ensures many downloads. So it is a great platform to strengthen your revenue. The following brief guide is to help you upload an app on PlayStore.
Before Uploading
The release version of your application is ready. Now it’s time to upload it to Google Play Store. Before uploading, make sure that:
- Don’t forget your Play App signing, especially if you plan to build and then upload an Android App Bundle.
- Google Play Store has a compressed download size restriction of 150mbs or less. Make sure to not go beyond this recommended limit.
Upload an App on PlayStore – A Step-by-Step Guide
Step 1 – Create a Developer Account
The first thing you need to upload an app on Play Store is to create a developer account on Google Play Console. Google Play Console is sort of like a controlling center where an application gets published and its performance gets monitored.

To create a developer account, you need to pay $25 – a one-time fee to open up your account. Fill out the respective credentials like your name, country name, and so on. After submission, your account will be approved within 48 hours.
Step 2 – Connect your Account to Google Wallet Merchant
The purpose of a merchant account is to receive payments from application downloads or in-app purchases. It enables quick and safe access to all payments. You also get to examine and manage your application sales easily. To set up your merchant account:
- Sign in to the Google Play Console account you have.
- From the Menu, click on Reports.
- From there on, click on Financial Reports.
- Select Set up Merchant Account.
- Add the required details and Submit.
Your developer account is now linked to the merchant account.
Step 3 – Create Application – Finalize your App’s Information
With your merchant account set up and linked, the next part is to Create an Application. Proceed with the following steps:
- After selecting the Menu, Click on All Applications
- From there on, select the option of Create Application.
- Pick your preferable language, set it as default, and add the title of your application (50-character limit).
- After selecting Create, fill out the necessary information for your application as given below.
Add a short description of your app which will appear in the Play Store listing. The goal here is to convince your audience to download the app. Within three lines, you have to sum up all the exciting features of your application.
A complete description will highlight the details of your application which will be shown once the user clicks on your app store listings.
Add screenshots that feature your app in action. The minimum requirement for screenshots is two. However, for the best results, aim for almost 7/8 screenshots.
Hi-res Icon – this is the icon that will be displayed on Play Store and your user’s device after downloading.
A feature graphic with minimal writing that best reflects your brand and can be a great source of promotion.
Video Link – a YouTube video of your app in action.
Category – Specify your application’s type and category.
Add Contact Details in addition to the mandatory contact details.
Step 4 – Upload the APK (Android App Kit)
After successfully following the above steps, it’s time to upload the APK files. Here’s how we can do this:
- Firstly, go to Release Management
- Click on the App Releases option from the menu.
- From the options of the close test, open test, internal test, and production release select the type of release for your application.
Production release is the final release of your application to Google Play Store. But if you want another opportunity to test your app and make changes according to the feedback, you can opt for any of the other three options accordingly.
- Once done, click on Create release and you will be redirected to the New Release to production page.
- Now, do you want the Google Play App or local signing of your app? If you don’t want the Play Store signing, click on OPT-OUT.
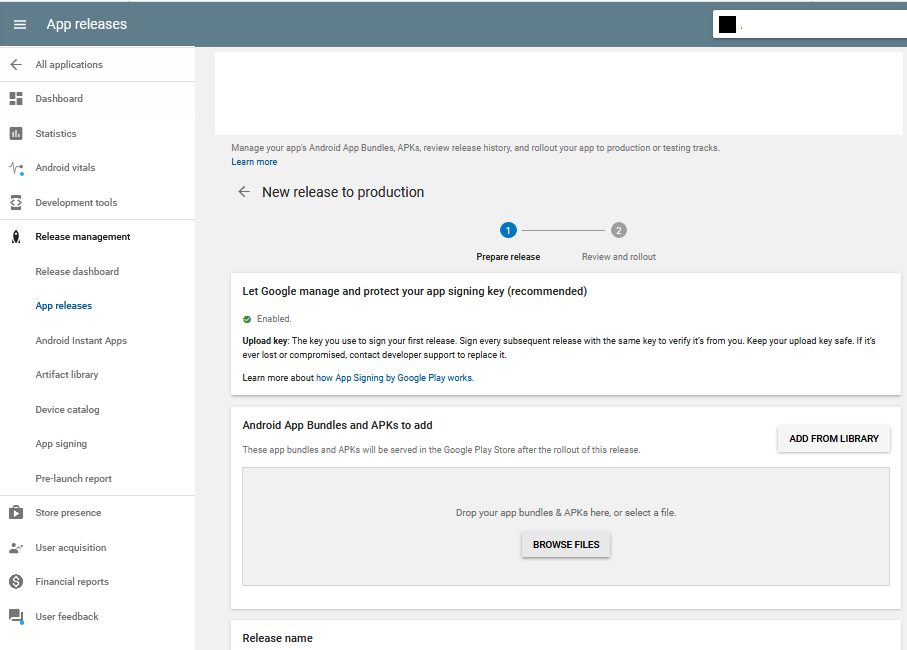
- Next up, select Browse Files.
- Pick your app Bundle files or APK for uploading.
- By clicking on Review, you will be confirming and submitting your application’s release information.
Before you finally upload an app on PlayStore, it needs to go through a few more steps.
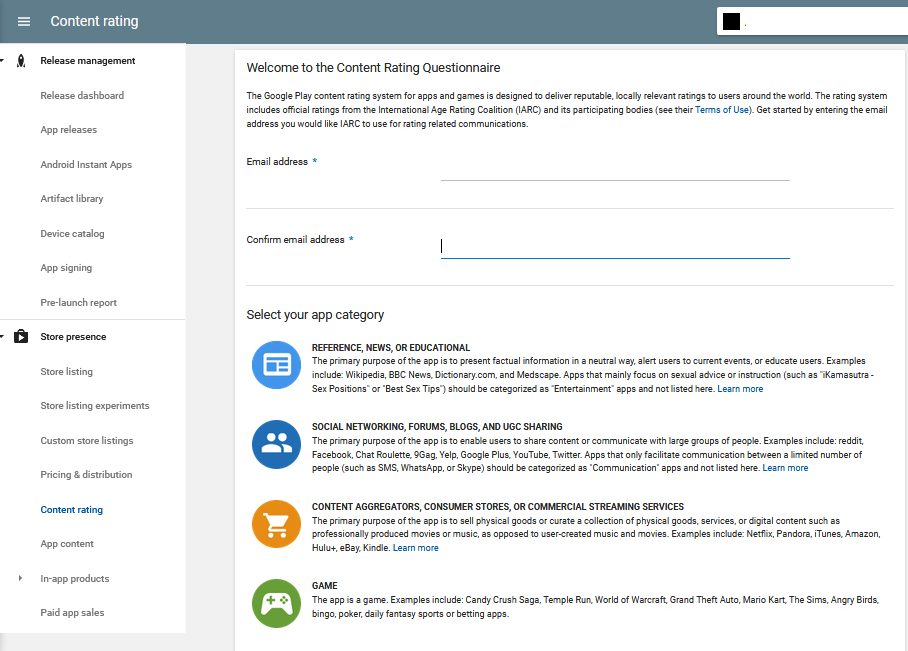
Step 5 – Content Rating where you Rate your App
- Set your app’s content rating. From the left menu, click on the Content Rating page.
- Select Continue.
- Enter and confirm your email address.
- Pick your application’s category from the given options.
- Fill out the given questionnaire, which is a survey through which Play Store rates your app. Select Save Questionnaire.
- Click on the option of Calculate Rating. After calculation, you will get the final rating of your app that will be displayed on the Play Store.
- To confirm the app’s rating, click on Apply Rating.
Step 6 – Define your Pricing and Distribution Plan
If you plan to launch a paid app, set up the pricing of your app. Also, make a distribution plan for your app – in which countries do you want to publish your app?

- Select from the options between Free or Paid.
- Select Available for the countries that are a part of your distribution plan, select Unavailable otherwise.
- If the app is not appropriate for children under 13, select No. Otherwise, select Yes.
Will there be ads on your app? Select Yes or No accordingly.
Step 7 – Finally, It’s Time to Publish the App
Review all the information once again. Well, now your app is ready for the big launch. From the left menu, go back to App Releases, and click on Manage Production.
- Click on the respective prompts: Edit Release – Review – Rollout to Production – Confirm.
Your app will be shipped and published to the selected countries’ Play Store within two hours. Congratulations on the successful launch of your application!
What Now? – Application Promotion and Maintenance
Lastly, you need to create an active marketing strategy for your app. Social media is a perfect platform to promote your application. By using paid ads on Instagram and Facebook, you will reach your targeted audience quickly and gain numerous downloads. But your job does not just end here. A popular application provides its users with frequent updates and fixes users’ issues.
Sum Up
Hopefully, the above instructions were clear enough to help you upload an app on PlayStore. After launching an application, you have to put continuous efforts into its maintenance. Only then will you be able to rise above your competitors.
Do you want different versions of your app? Our flutter app development team at Flutterdesk is here to empower your business and create top-notch cross-platform mobile applications for you.